One Spirit
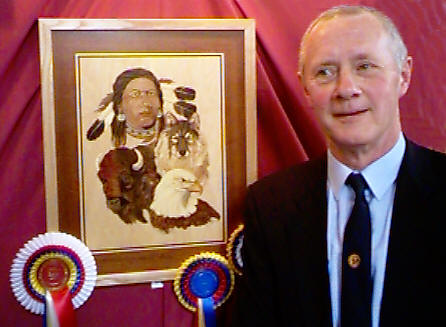
John Jeggo describes the making of his Rosebowl-Winning picture. Click the pictures for enlarged views.

On a visit to America I found this picture on a jig-saw puzzle box and thought it would make a good subject for marquetry with the level of detail required.
If I am faced with a large picture to do I try to break it down into sub-assemblies; in this case the picture divided naturally into the four portraits. I find that making a picture this way is easier because it is less daunting to work on one sub-assembly at a time. The method does have its down-side of course (some say it is fraught with danger) since you have to cut the sub-assembly into the complete background veneer of the whole picture and this can involve a long peripheral cut. Making sure the sub-assembly does not move when carrying out this operation is very important - though an error is not disastrous since you can replace veneers in the assembly if necessary.

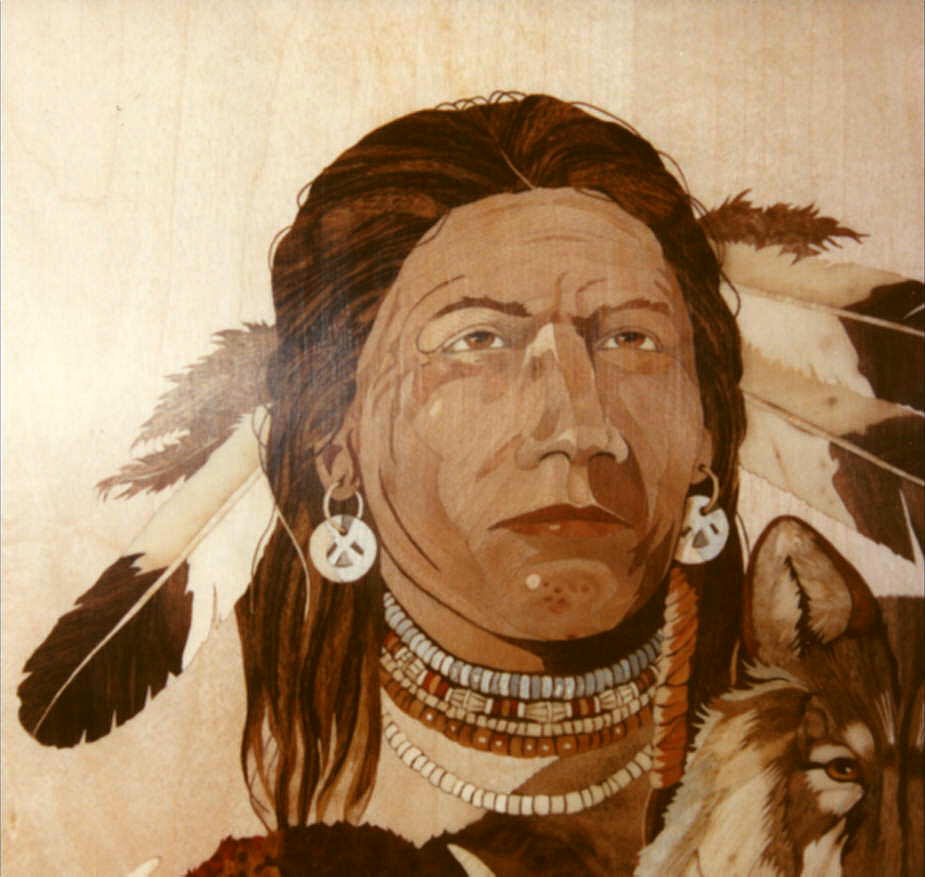
I started the picture with the American indian's face, mainly because I had tackled portraits and faces before and thought this would make a good starting point. The feathers were reasonably straightforward, but the face was more tricky. I try to select two or three veneers of similar tones and colour so that they blend together when the light and dark areas are cut in. This helps to prevent a "wooden" look.
"positioning of the eyes is important..."
I nearly always work inwards, towards the eyes and finishing up with the highlights. Careful tracing through and positioning of the eyes is important so that the correct expression is obtained.
For the hair I was lucky to find veneers which had light and dark grain, curved around knots, which fitted the requirement perfectly.

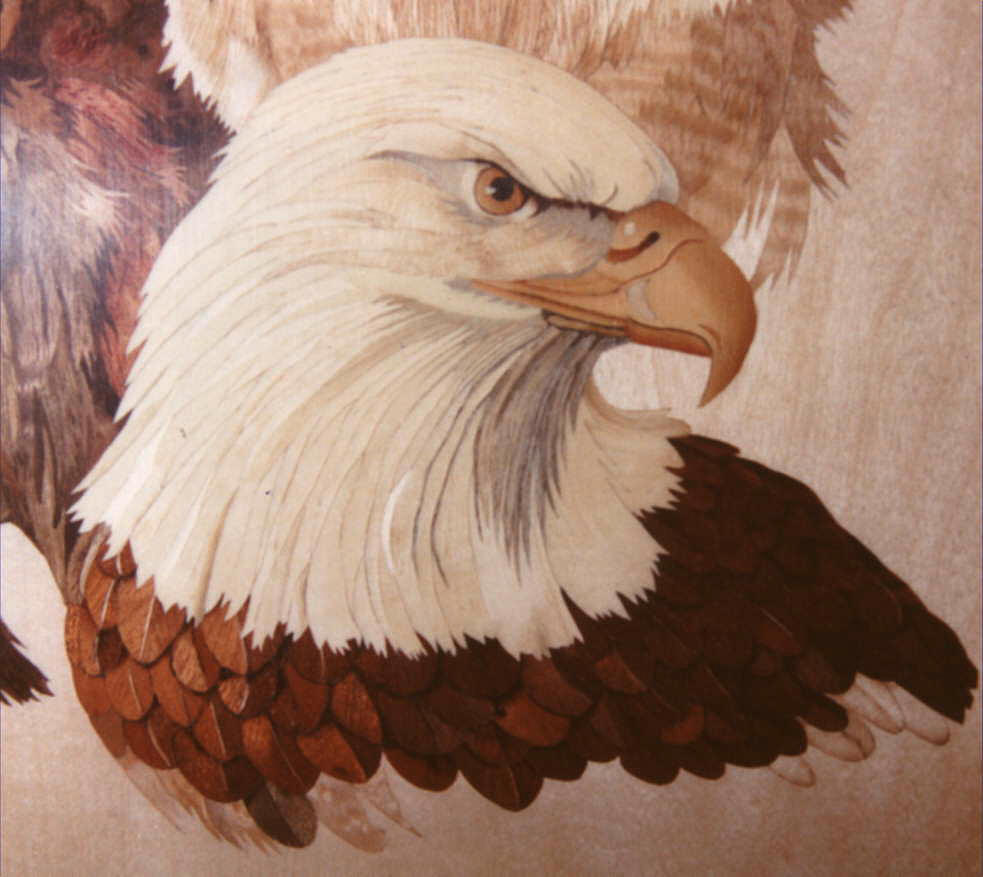
"I was lucky with the beak..."
The second assembly I worked on was the eagle. I thought the lower feathers would be reasonably straightforward to do - and so it proved! I used various shades of sapele for these and sand-shaded the top edges to give the overlapping effect. I was lucky with the beak, finding a piece of yew to do the job without any sand-shading.
The white feathers of the head and neck were more difficult. I could not find any white veneer (apart from a small piece of holly) with any curved grain to follow the shape required. It was only after much trial and error that I eventually overcame this problem by cutting in many pieces and slivers of veneer to represent the thin feathers.
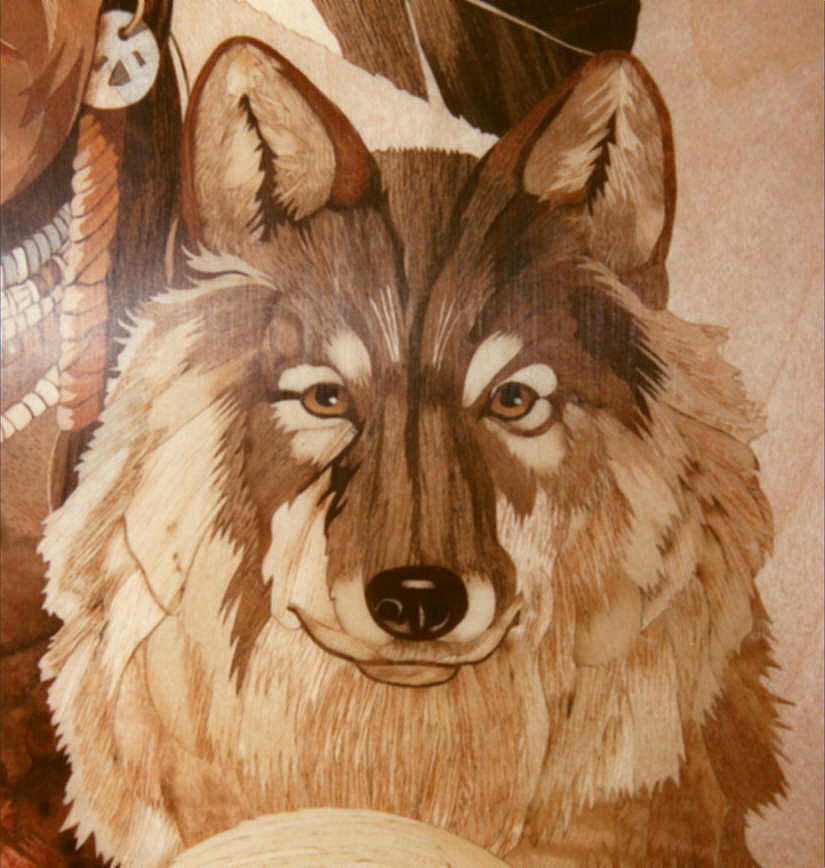
The wolf was next. By this time I had cut in the Indian's and the eagle's heads into the main picture background veneer and I decided it might be easier to do the same with the wolf's head, without making a sub-assembly.

"a fluffy look..."
I used ash veneer, which has plain and grained areas, to make the fur. Many pieces were cut in with interlocking "fingers", sand-shaded to give a "fluffy" look.

Again the eyes were last. For the dark pupils I used walnut burr, shaded on a soldering iron to give a really black effect.
The buffalo was last, again cut straight into the main picture (there was a lot of inticate cutting to join up the wolf's and eagle's heads).
I managed to obtain a piece of red burr veneer for the forehead, but the gradual change from red to the dark brown of the neck presented a large problem. Sand shading did not seem to work, so I eventually used a gradation of veneers from red, through reddish-browns, to dark brown. The red forehead appears as the highlighted area of the whole head.
"considerable selection and rejection of veneers..."
I could find no veneer to use for the neck fur without cutting in dark walnut strips to give it the correct look - there was considerable selection and rejection of veneers in the neck area before I was satisfied with the final result.
This proved to be a very difficult picture to make. There were times when I thought I had "bitten off more than I could chew" and I almost gave up on several occasions. At these times I find it best to leave it for a while and go back to it at a later date. This, of course, is one reason why marquetry pictures take such a long time to complete - it's not the cutting, but working out how to do it!
