Depicting Stonework in Marquetry
Stone walls, or similar items, can often appear in marquetry pictures. Depicting them successfully can be a problem, but here Quentin Smith describes a fairly simple technique which can achieve big results.


First, paste the design to the surface of the background waster or cardboard. Then cut out a small section with well defined edges.
Retain the piece extracted and cut an insert piece to fit the whole window in the usual way.
Next, cut the insert piece into individual 'stones' by eye, following the approximate design from the part of the design removed. These pieces are eventually going to be inserted into the picture as separate stones, but first they need enhancement …


Carefully touch two sides of each piece against a hot iron to darken the edges. Don't worry if the pieces are not all equally darkened - this will simply appear as a less even wall - but be consistent, here the left and top edges are shaded.
After shading, return each piece to its correct position in order to make the final assembly easier.
Stick a piece of low-tack masking tape under the window, giving a tacky surface, and place each individual stone onto the tape. In many cases it can be easier to insert each piece immediately after shading.


Cover the front surface of the completed area with a piece of clear tape (don't use opaque tape as it may remove the pattern from your design ... use clear and it can be left in place while work continues ... even if you end up with several layers.)
Turn the work over, apply PVA glue and rub in well in the usual manner. Allow this section to dry before working on an adjacent area.
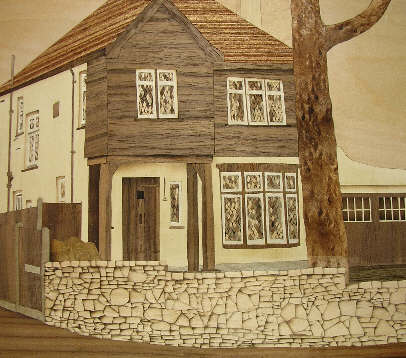
Here's the finished picture. Only the wall and tree remain on this site now - the house has been demolished and replaced with a new apartment block. Check it on Google Street View!